
How to create graphics that attract, not scare?

The aesthetics of the graphics that you share on your social media or on your website basically shows what quality you offer. If you do not want or cannot yet invest in cooperation with a professional graphic designer, read the following article and see how easy it is to prepare aesthetic graphics.
Follow some of the links that we paste below. We have selected those that are free and simple to use, and at the same time those that will allow you to maintain your own style and create really nice graphics.
Where to create graphics?
- After logging in, you will see an automatic prompt how to create graphics. At the top left is the option create a project, and below you can choose the format e.g. Facebook post. It is the perfect size, so it is worth taking advantage of.

- After clicking, you will be taken to a new subpage of your project. In the menu on the left you have quite a few options for free graphics, however be careful in their selection. Instead of choosing a ready-made graphic, you can also choose the option to insert your photo. To do this, in the menu on the left, select a segment Elements, and then the option Grids.

- Click on the first proposal allowing you to insert one photo for the entire post.

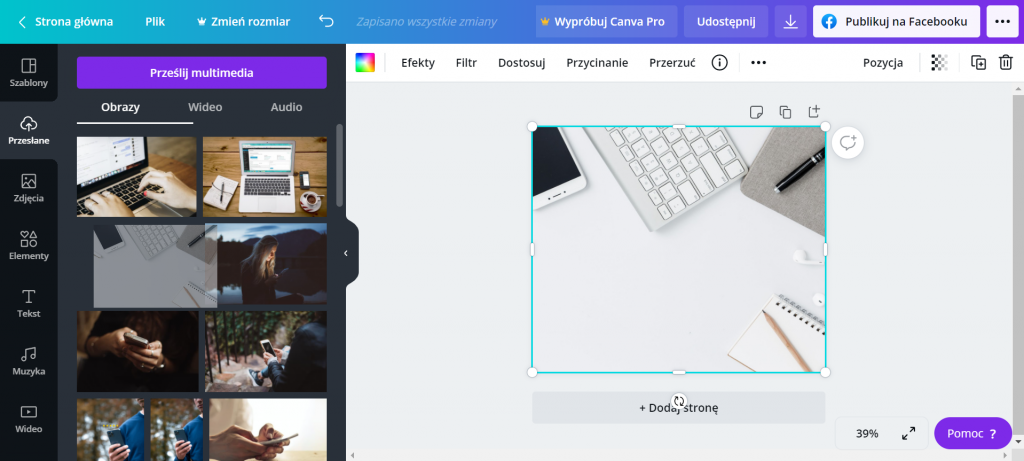
- Once you have chosen the layout with the whole photo in the background, also in the menu on the left page you will see an option uploaded. After clicking, select a window Upload media. Then select a picture from your computer (below you will get information on where to get nice pictures).
- The uploaded photo will appear under the green button. Drag them per il tuo progetto.
- Once you have selected the photo, The background is ready. Then add your logo also with the option upload multimedia. Drag them onto the project. Be sure to use only a transparent logo. Logos that have a background when inserted into a photo will look very cheap.

- In the left menu you will find the option textIn a very simple way, you can add inscriptions. Make sure the font is consistent with your website and use the same font most of the time. Thanks to this, customers will begin to recognize you in the crowd of other ads.

Less is more!
[!] When creating graphics, you can be guided by the principle less means more. Minimalism is now in fashion, and by limiting the number of special effects on your graphics, you draw the visitor's attention 100% to the content.
Where to find photos?
www.pexels.com / pixabay.com/en
It's two free and secure photo database. There you can download backgrounds for your graphics fully legally. now fun is on your side. Create. Compose. Inspire. However, always remember that each graphic is at the same time a showcase of your business. Every time you publish any post, make sure even 10 times that it is aesthetically pleasing, consistent with you and has a chance to catch your eye.


Author's photos
Ready-made photos found on the Internet are aesthetic and often attract attention so it's worth using them. However, if you have your own photos, which you took, for example, during treatment, which depict the effect before and after one of the treatments or simply depict the ensemble or the interior of the object, then use them.
Customers prefer to look at original photographs, because then they see what your place, your work and your team really looks like. They treat them as more true, sincere and thus become attached more quickly. This is a reliable way to build relationships. However, keep in mind that if you want to share photos where the client is visible, then you must have permission to do so.
When choosing photos, however, be careful and pay attention to quality. You've probably also seen “before and after” presentations on Facebook that absolutely do not attract or encourage. Although the effect is visible, the poor quality of the photo is more anti-advertising than motivation for the client.
A few examples
